


Summer, sun, sunshine – the warm season finally has Europe firmly in its grip, and people are drawn to the water. Whether on the lake, on a canal or in the middle of the sea – with good light and blue skies, summer is the ideal time of year for a photo shoot. But watch out: Even when the weather is nice, good photos don’t succeed on their own. With these facts, tricks and tips, your photos will turn out even better. Here, the rules of the past also apply in the digital age.
Tip 1: Capture movements skillfully
Even small movements of the crew bring naturalness into the picture and do not let it look posed. In addition, the movement contributes to the fact that you do not tense up and the pose does not look stiff. In contrast to choppy poses, flowing, everyday movements make for better photos. As a general rule, movements are best photographed with an open aperture. Because the more open the aperture (= small f-number), the shorter the shutter speed. This way, the movement does not blur, but can be “frozen”.
Tip 2: use the portrait mode
Meanwhile, almost every cell phone has the so-called portrait mode, which focuses the person in front of the camera and blurs the background for it. This mode is particularly suitable for close-ups up to the waist. Portrait mode makes it easy to bring out the main subject of a picture, literally putting it in the foreground.
It also gives the image a professional look, as if the photo was taken with an expensive camera with a large telephoto lens. Last but not least, the mode adds some depth to the image, which can make it look more interesting.
With a “real” camera, open aperture = blurred background. Meaning: the more open the aperture, the shallower the depth of field, which blurs the background beautifully. Photographers say: if you take aperture 2.8, the bokeh appears in true splendor (bokeh: from Japanese boke “blurred, blurred” is a term used in photography for the quality of an out-of-focus area).

Closed aperture = large depth of field, means: the depth of field increases the larger the aperture number is chosen (i.e.: the “smaller”, i.e. more closed, the aperture is). With values above 8 to 11, it is possible to focus not only on the foreground. It is important to note that the shutter speed or ISO number must be increased.
Tip 3: Proper light is key
It may not be the best idea to shoot photos in direct sunlight. On the one hand, it’s hard to keep your eyes open because of the brightness, and on the other hand, it can easily overexpose your pictures. Remember: When the sun is shining, use f/8. This aperture setting is usually the best compromise for saving image details in bright light. Automatic exposure programs sometimes weaken in this discipline and distort the colors.
The so-called “golden hour” of photography occurs twice a day, in the hour after sunrise and in the hour before sunset. This means that the sun is low, bathing everything in orange-reddish light, causing long shadows and simply creating a beautiful atmosphere. In the hour of sunset, the so-called “blue hour”, the sky is particularly blue. The contrasts are softened and the light has a particularly beautiful mood. Afterwards: Almost night already? Then take aperture 2.8.
Tip 4: Play with the background colors
In summer, nature shines in the brightest colors: Yellow fields, green meadows, colorful flowers and beige sand on the shore, blue water. Every (amateur) photographer should take advantage of this. Colorful images look more appealing and lively than monochromatic photos and convey cheerful emotions and summer moods.
In addition, the combination of complementary colors makes the photo an eye catcher, as a bright contrast is created between the individual picture elements, e.g. between an orange top and a green background. Last but not least, colors play a not unimportant role with regard to an aesthetically pleasing composition of a photo.
Tip 5: Pay attention to foreground, middle and background
As a rule, the background of a picture should be calm and not too colorful, otherwise it will distract the viewer from the actual subject. In landscape photography, the rule applies vice versa, because to give depth to the shots, the phrase: foreground makes picture healthy is true there.

Tip 6: The water should not “flow out”
When photographing on water, make sure that the horizon is “straight” (i.e. horizontal), otherwise the image will look like the water is “flowing out” when viewed later. As always, the same applies here: Exceptions prove the rule. For example, a “slanted” horizon can artificially dramatize the scene.
Tip 7: Unusual perspectives
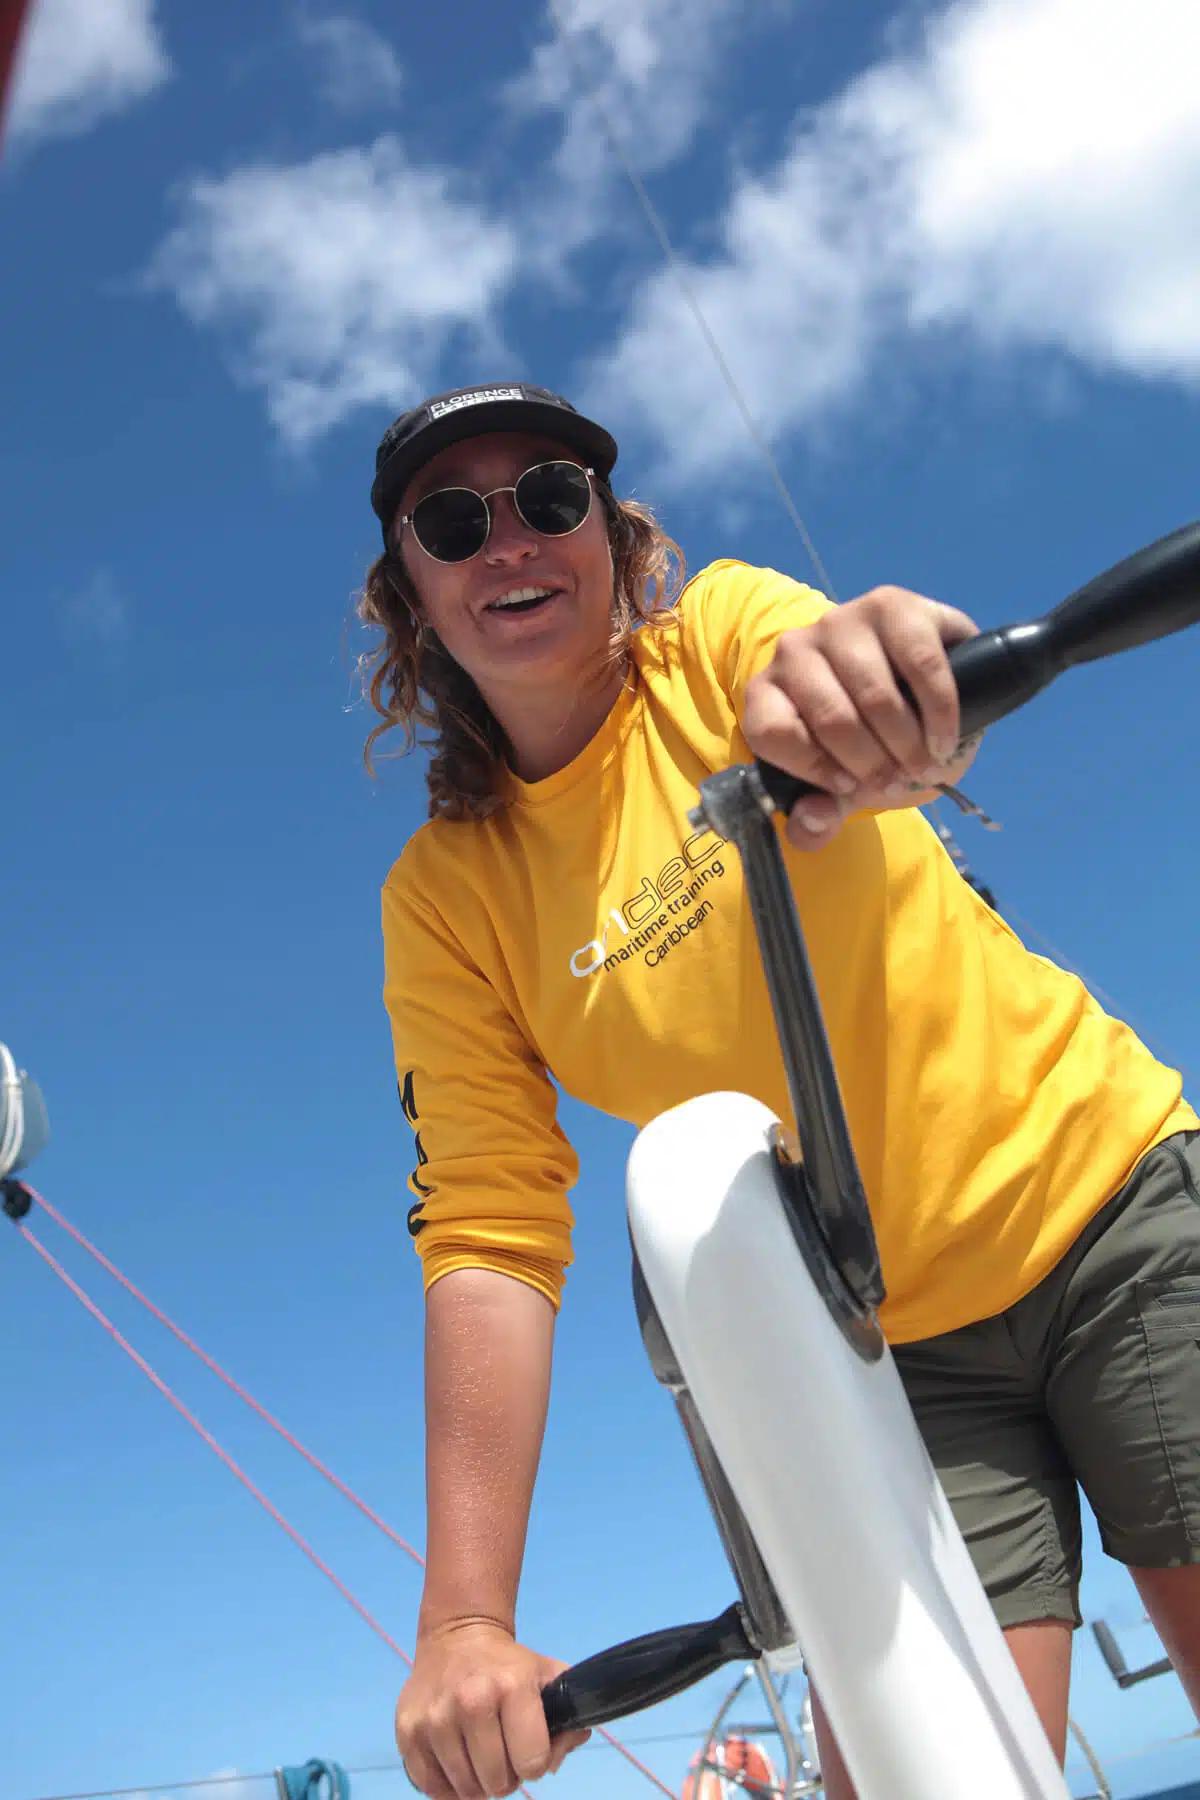
Sometimes it’s better to change sides, look for a higher point or even get down on your knees to get a good framing shot. Example: you want to photograph a crew member at the winch (on a sailing yacht)? Don’t stand in front of the person, but, lie down with your back in the cockpit and take the photo “from below” – this increases the tension and makes the picture interesting.
By the way, a good image composition can also consist of leaving things out. Speaking of omitting: instead of shooting wildly, consider beforehand whether the subject / situation is worth photographing. If so: take some time for an exciting image composition (see below), if necessary you can also “arrange” a little.
Tip 8: Golden section and rule of thirds
Speaking of image composition: the implementation of the golden section means in photography, simply put, that we – for example, in a portrait – do not place the head in the center, but either in the front or rear third. This division is perceived by us as much more coherent and pleasant.

The golden ratio consists approximately of a 1/3 and 2/3 ratio. The grid of the camera can be very helpful here, because it shows the appropriate intersections perfectly. The golden ratio can of course also be wonderfully applied to motifs on or near the water and thus achieve a perfect image result.
The rule of thirds for image division is relatively simple: while taking a photo, you can divide the image into three parts, and position the subject on one of the two horizontal or vertical lines, or better: at their intersection points. This increases the tension and makes the photo even more interesting.

Tip 9: To flash or not to flash?
Opposites attract even with simple rules apparently, because: If no sun shines through the cracks, you have to flash hurriedly. But be careful with the direct flash, otherwise the faces may be overexposed in contrast to the background. If you prefer not to use a flash, you should first open the aperture and then turn to the shutter speed and ISO setting.
Often, amateur photographers can be seen “flashing” distant objects in the dark with their cell phone or built-in camera flash. A better idea here might be to turn off the camera’s automatic mode (or turn off the flash directly), and – in the case of a camera – switch to P mode (program automatic) instead.
In this camera mode, there is an automatic setting of aperture and exposure/shutter speed. By the way, you can easily adjust the ISO setting yourself, depending on the lighting conditions and the area of use. The darker it is, the longer the exposure time – make sure you have a solid background (or use a tripod!).
Tip 10: Enjoy taking pictures
It is best to invest a few minutes to get to know your camera better before you go on vacation. Then ISO numbers, program automatic or the white balance are no longer foreign words for you. The fun of photography will then come all by itself.
The only thing missing is a nice mood, which is usually the best indicator to reach for the camera. The real art then consists of capturing this beautiful mood to the picture as well – with the aforementioned tips, this should now no longer be a problem.